
When you deploy a Cloud Run service with a Cloud SQL database, the default setup routes traffic over the public internet. The connection is encrypted and Cloud SQL only accepts authorized connections, but there’s a better approach.
Your data doesn’t need to leave your private network. That’s where Serverless VPC Access comes in.
This article shows you exactly how to connect Cloud Run to Cloud SQL PostgreSQL using a VPC connector — keeping all traffic private, reducing latency, and following security best practices.
By default, Cloud Run is fully serverless — it doesn’t run inside your VPC. When you connect to Cloud SQL from Cloud Run, traffic flows through:
This works but has downsides:
Serverless VPC Access is a feature that allows serverless environments (Cloud Run, Cloud Functions, App Engine) to send requests to resources in a VPC network using internal IP addresses.
The connector works by provisioning a dedicated /28 subnet (16 IPs) in your VPC and spinning up e2-micro VMs that forward traffic between Cloud Run and your network. You control which traffic uses it via the —- vpc-egress flag:
A few things worth knowing: connectors are regional, require their own /28 that can’t be shared, and multiple Cloud Run services can reuse the same connector. IPv6 and Shared VPC (unless the connector is in the host project) are not supported.
Cost: around $2–3 per day for Cloud SQL (cheapest tier). Destroy resources after testing to avoid charges.
Clone the repository:
git clone https://github.com/misskecupbung/gcp-serverless-vpc-access.git
cd ~/gcp-serverless-vpc-access/

Set your project ID and enable required APIs:
export PROJECT_ID="your-project-id"
gcloud config set project $PROJECT_ID

gcloud services enable compute.googleapis.com
gcloud services enable sqladmin.googleapis.com
gcloud services enable vpcaccess.googleapis.com
gcloud services enable run.googleapis.com
gcloud services enable servicenetworking.googleapis.com
gcloud services enable cloudresourcemanager.googleapis.com
gcloud services enable cloudbuild.googleapis.com
These APIs are required for:
API enablement takes 1–2 minutes.

Before running Terraform, build and push the Flask app container. Terraform will deploy this image to Cloud Run:
cd ~/gcp-serverless-vpc-access/app/

gcloud builds submit --tag gcr.io/$PROJECT_ID/my-api
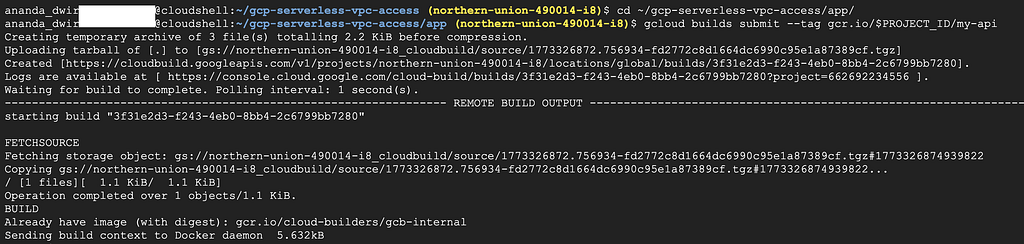
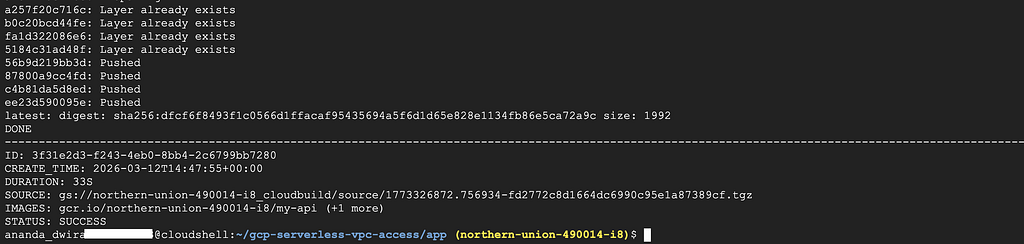
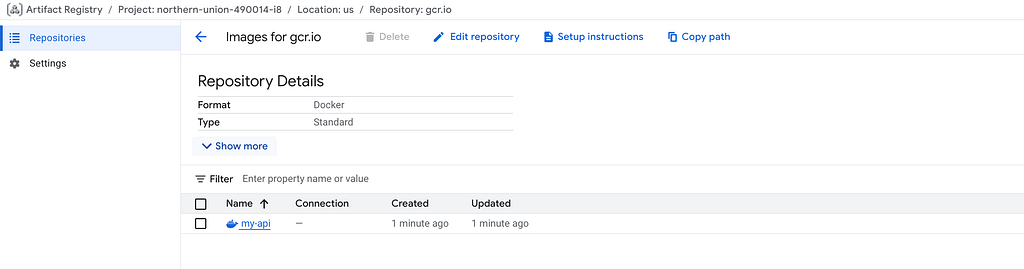
The build takes about 1–2 minutes. Once complete, the image is stored in Google Container Registry.
Navigate to the Terraform directory:
cd ~/gcp-serverless-vpc-access/terraform/
cp terraform.tfvars.example terraform.tfvars
Update the project ID:
sed -i 's/your-project-id/'$PROJECT_ID'/g' terraform.tfvars
Verify the configuration:
cat terraform.tfvars

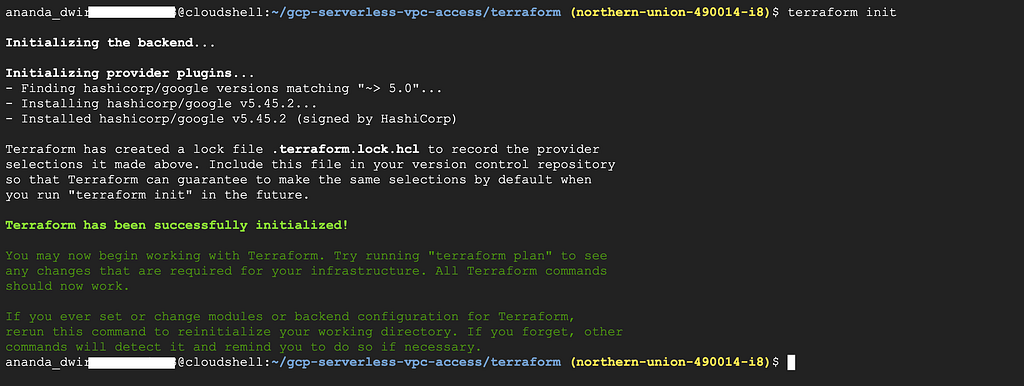
terraform init
Generate an execution plan:
terraform plan

Apply the configuration:
terraform apply

Type yes when prompted.
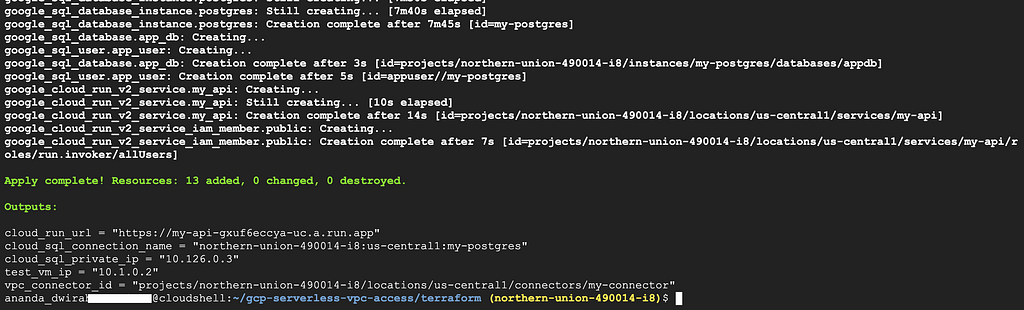
This creates:
The apply takes 8–12 minutes because Cloud SQL provisioning is slow.
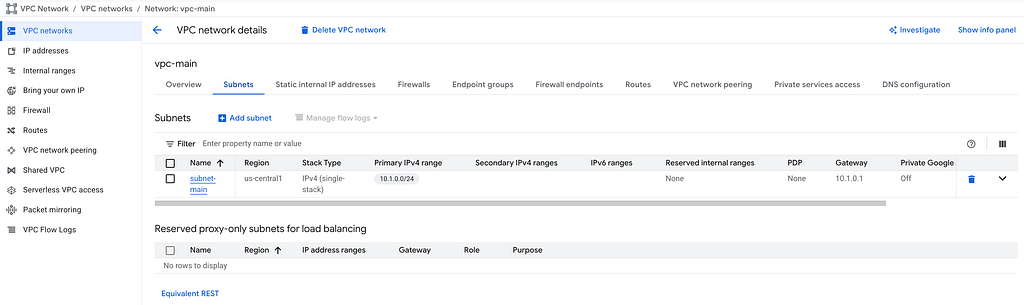
Navigate to VPC network → VPC networks in the console:

You should see vpc-main with:
Go to Serverless VPC Access in the console:

The connector should show:

Navigate to SQL in the console and click on my-instance:

Key details to verify:

Go to Cloud Run and click on my-api:

Verify:

Navigate to Compute Engine → VM instances:
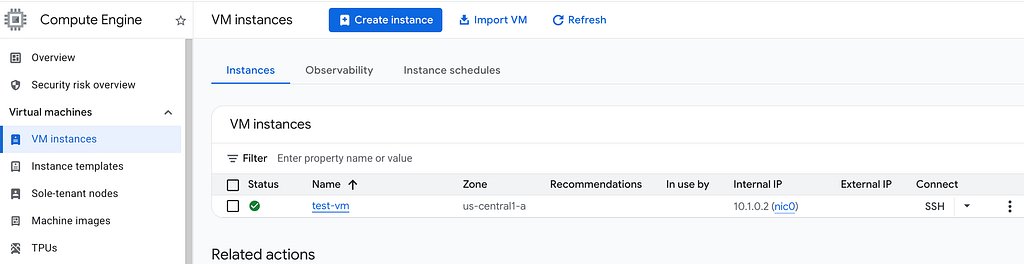
The VM should have:
Verify the Cloud SQL instance has only a private IP using gcloud:
DB_IP=$(terraform output -raw cloud_sql_private_ip)
echo "Cloud SQL Private IP: $DB_IP"

gcloud sql instances describe my-postgres \
  --format="value(ipAddresses)"
You should see only a private IP (something like 10.x.x.x). No public IP.

This confirms the database is not accessible from the internet. Only resources inside the VPC can reach it.
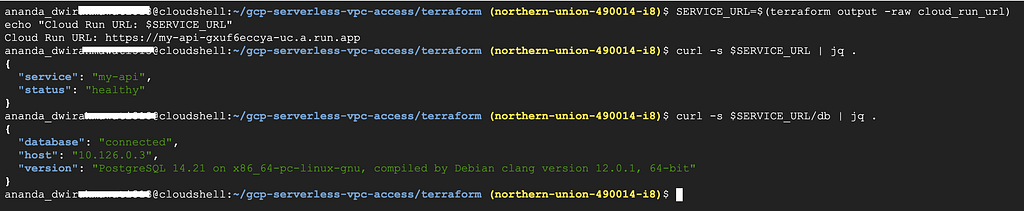
Get your Cloud Run service URL:
SERVICE_URL=$(terraform output -raw cloud_run_url)
echo "Cloud Run URL: $SERVICE_URL"
Test the root endpoint:
curl -s $SERVICE_URL | jq .
You should see:
{
  "service": "my-api",
  "status": "healthy"
} 
Now test the database connection:
curl -s $SERVICE_URL/db | jq .
If everything works, you’ll see PostgreSQL version information and confirmation of the database connection.
{
  "database": "connected",
  "host": "10.126.0.3",
  "version": "PostgreSQL 14.x on x86_64-pc-linux-gnu, compiled by gcc..."
} 
This confirms that:
Let’s double-check that the Cloud SQL instance is truly private by connecting from our test VM:
DB_IP=$(terraform output -raw cloud_sql_private_ip)

gcloud compute ssh test-vm \
  --zone=us-central1-a \
  --tunnel-through-iap \
  --command="PGPASSWORD=changeme123 psql -h $DB_IP -U appuser -d appdb -c 'SELECT version();'"

This proves the database is accessible from inside the VPC but not from the outside.
Destroy resources when done:
cd ~/gcp-serverless-vpc-access/terraform/
terraform destroy
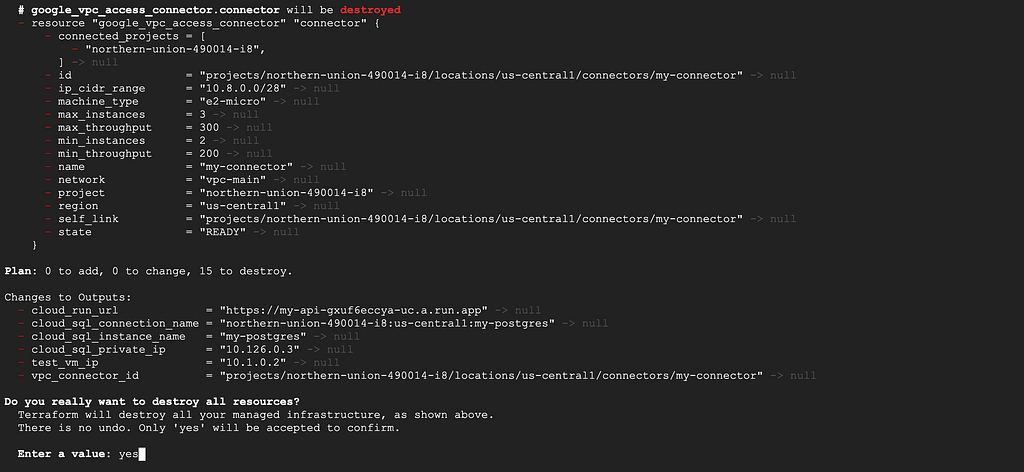
Type yes to confirm.
If you encounter Failed to delete Service Networking Connection.
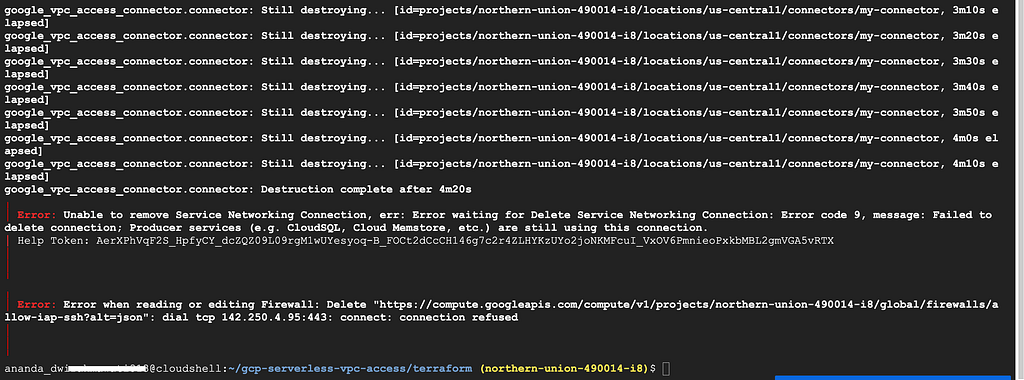
This happens because the VPC peering connection (servicenetworking.googleapis.com) created by Private Service Connection is still active. Delete it manually:
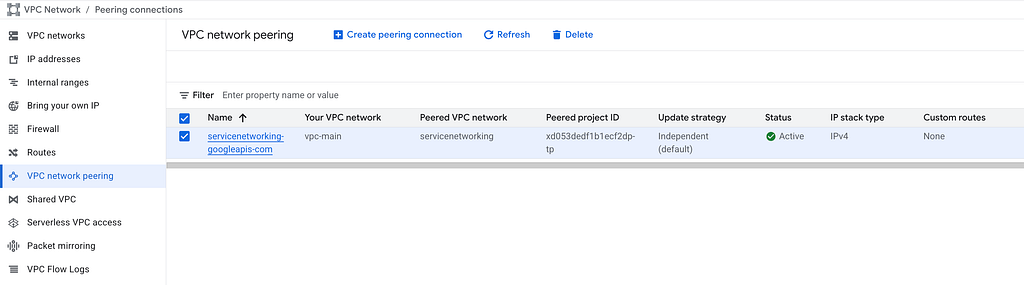
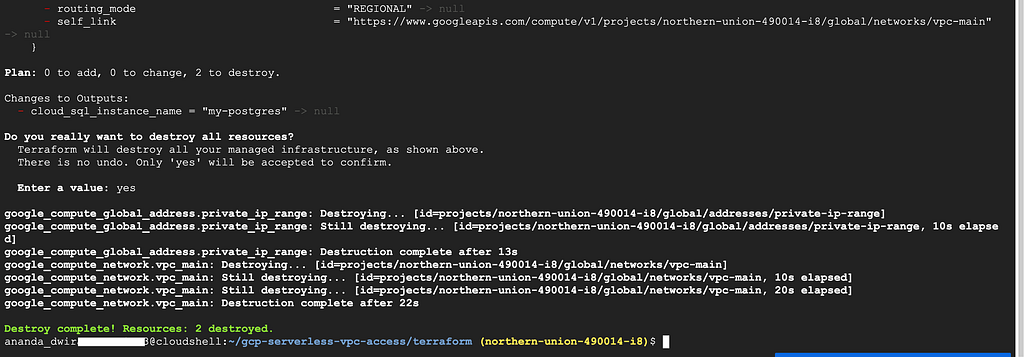
Wait 30 seconds, then run terraform destroy again.
<hr><p>Connecting Cloud Run to Cloud SQL Without Going Through the Public Internet was originally published in Google Cloud - Community on Medium, where people are continuing the conversation by highlighting and responding to this story.</p>