
So you want to build a backend for your mobile app? You could spin up a VM and manage everything yourself, but honestly, that’s a lot of work. Let me show you a simpler way using Google Cloud.
In this tutorial, we’ll build a REST API that’s ready for production. It has authentication, rate limiting, auto-scaling, and a real database.
App Engine is Google’s fully managed serverless platform. You deploy your code and Google handles the rest — servers, load balancing, auto-scaling, SSL certificates. It supports Python, Java, Node.js, Go, and more.
The Standard environment (which we’re using) scales to zero when there’s no traffic, so you only pay when your API is actually being used. It also starts up fast — typically under a second for Python apps.
Firestore is a NoSQL document database built for automatic scaling and high performance. Each document is stored as a set of key-value pairs, and documents are organized into collections.
Key features we’re using:
Let’s go!
Before we start, here’s what we’re building:
The request flow is simple:
Before starting, make sure you have:
First, clone the code:
git clone https://github.com/misskecupbung/gcp-cloud-endpoints-mobile-api.git
cd gcp-cloud-endpoints-mobile-api

Set your project ID:
export PROJECT_ID="your-project-id"
gcloud config set project $PROJECT_ID

# Verify it's set correctly:
gcloud config get-value project

Now run the setup script. This enables all the APIs we need:
./scripts/setup.sh
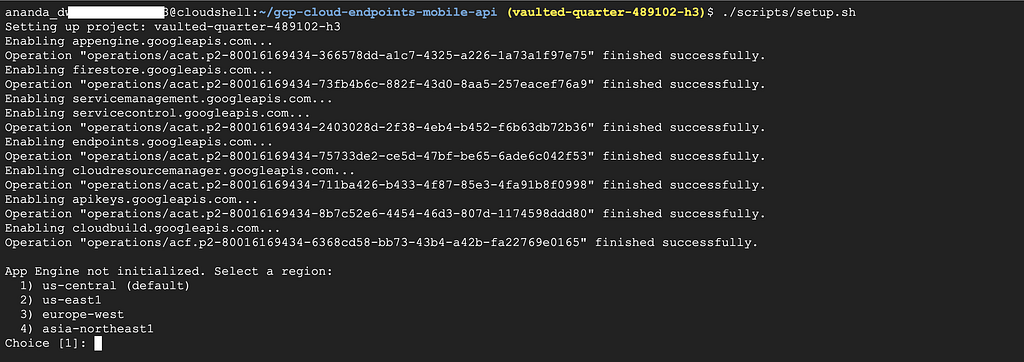
The script does a few things:
When prompted for a region, pick one close to your users. us-central is the default.
Let’s see what we’re deploying. Open app/main.py

The API has these endpoints:
The health endpoint is public and the rest needs an API key.
This setup uses Firestore instead of in-memory storage, so your data persists across deployments and instance restarts. The health check pings the database to verify connectivity — useful for load balancer health checks and monitoring alerts.
The app uses the google-cloud-firestore Python client. Here’s what happens when you create a user:
db = firestore.Client()
doc_ref = db.collection("users").add(user_data)
Firestore automatically:
For queries, we can filter and order:
query = db.collection("users").order_by("created_at", direction=firestore.Query.DESCENDING) No need to set up indexes manually for simple queries — Firestore creates single-field indexes automatically.
Cloud Endpoints uses an OpenAPI spec to define your API and enable API key validation. Update it with your project ID:
sed -i "s/YOUR_PROJECT_ID/$(gcloud config get-value project)/g" openapi.yaml
Take a look at openapi.yaml. The key part is API key authentication:
securityDefinitions:
  api_key:
    type: "apiKey"
    name: "key"
    in: "query"

This tells Cloud Endpoints to validate the key query parameter against your project’s API keys. Invalid keys get rejected before hitting your app.
Now let’s deploy:
./scripts/deploy.sh

This script:
The first deploy takes a few minutes.

When it’s done, you’ll see your API URL: https://YOUR_PROJECT_ID.appspot.com
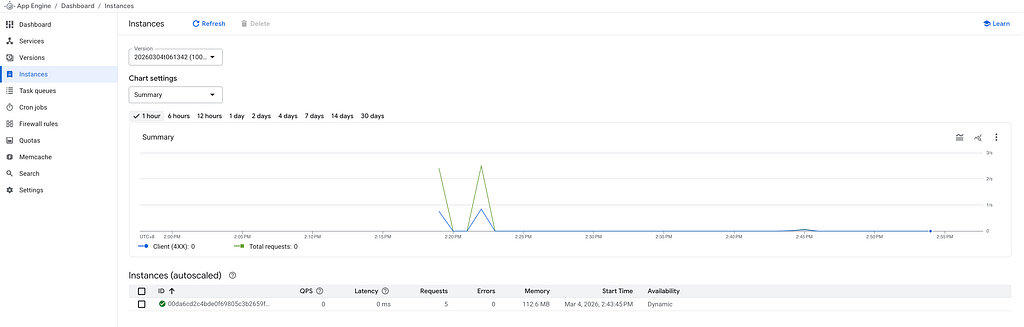
Open the App Engine dashboard to confirm your service is running:
https://console.cloud.google.com/appengine

You should see:
Click on the version to see instance details and recent requests.
Let’s make sure everything works. Run the test script:
./scripts/test-api.sh

Or test manually. First, get your API key:
export API_HOST="https://$PROJECT_ID.appspot.com"
export API_KEY=$(gcloud services api-keys list --format="value(name)" | head -1 | xargs gcloud services api-keys get-key-string --format="value(keyString)")
Try the health check (no auth needed):
curl "$API_HOST/api/v1/health"
You should see something like:
{
  "status": "healthy",
  "service": "mobile-api",
  "database": "connected"
} 
Or via browser

Now create a user:
curl -X POST "$API_HOST/api/v1/users?key=$API_KEY" \
  -H "Content-Type: application/json" \
  -d '{"name": "John", "email": "john@example.com"}'

And list users:
curl "$API_HOST/api/v1/users?key=$API_KEY"

Nice. Your API is live!
Open Firestore to see the user you just created:
https://console.cloud.google.com/firestore

You should see a userscollection with your new document. Click on it to see the fields: name, email, created_at, etc.

Let’s look at the various dashboards available.
https://console.cloud.google.com/appengine
Here you can see:
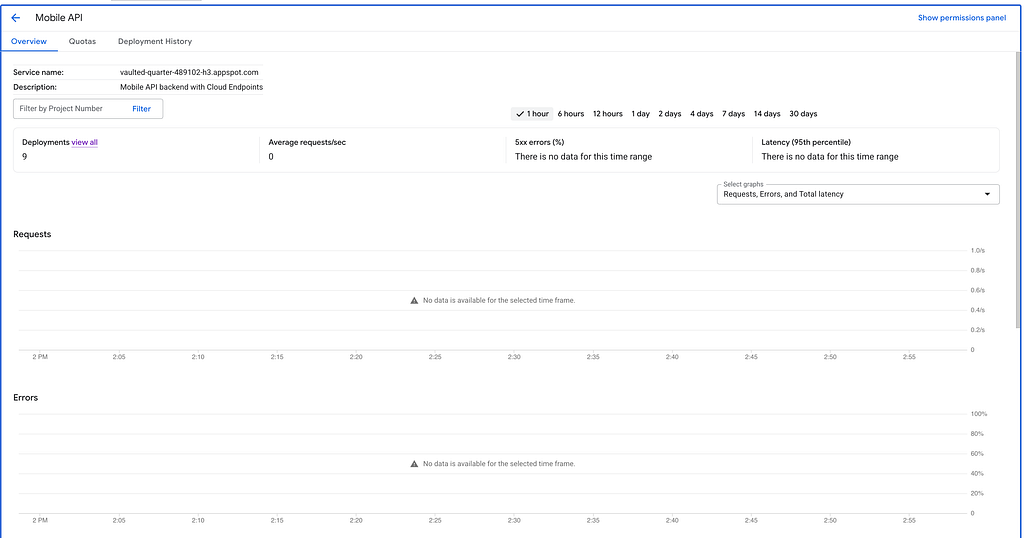
Go to Cloud Console > Endpoints:
https://console.cloud.google.com/endpoints

Here you can see:
Click on your service to see more details.
https://console.cloud.google.com/logs
Use this query to see your API logs:
resource.type=”gae_app”
resource.labels.module_id="default"
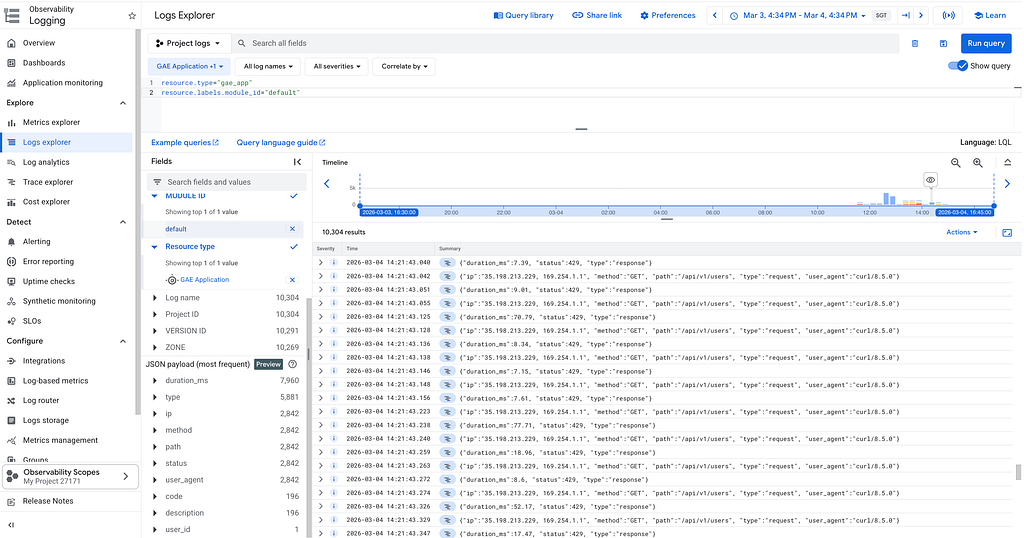
You’ll see request logs from gunicorn and application logs. Look for entries containing user_createdor request to find the structured logs from the app.
The API has built-in rate limiting using Firestore. By default, it allows 100 requests per minute per IP address. Since it uses Firestore, the limit is shared across all App Engine instances.
./scripts/test-rate-limit.sh

We can check from the logs also:
gcloud app logs read --limit=20 --project=vaulted-quarter-489102-h3 2>/dev/null | head -50
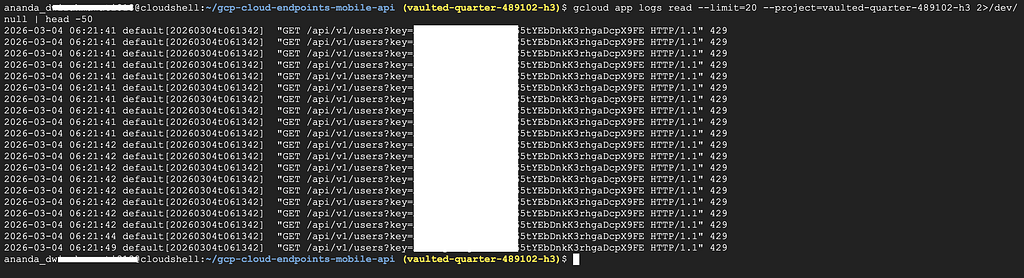
The script sends parallel requests to your API. After hitting the limit, you’ll see 429 Too Many Requestserrors.
You can adjust the limit in app/main.py:
# Rate limit config
RATE_LIMIT = 100   # requests allowed
RATE_WINDOW = 60   # per this many seconds
To avoid charges, run the cleanup script:
./scripts/cleanup.sh

This removes:
Drop a comment below or open an issue on GitHub if you have any questions or feedback.
Thank you and see you!